Input/Output Pins
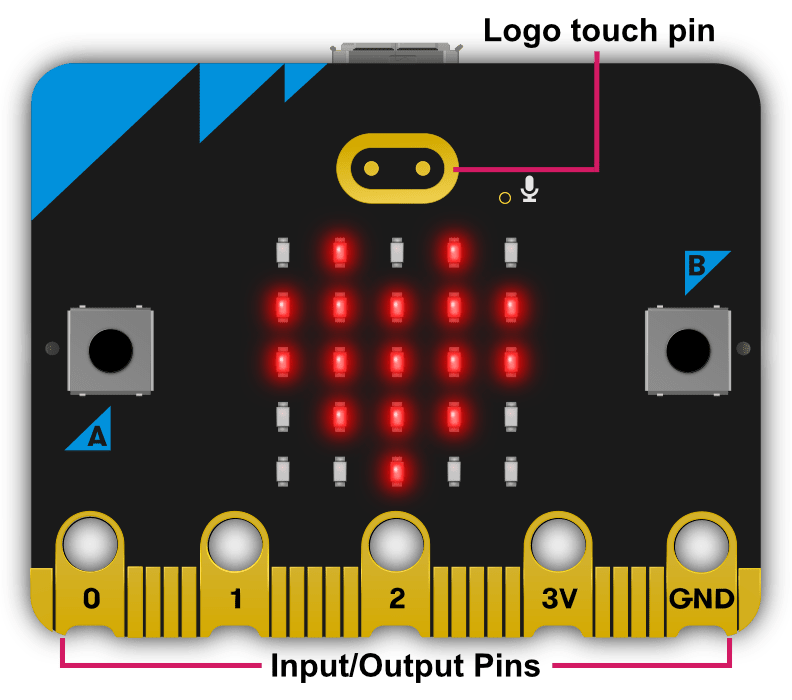
There are strips of metal along the bottom edge of the BBC micro:bit that make it look as if the device has teeth. These are the input/output pins (or I/O pins for short).

Some of the pins are bigger than others so it’s possible to attach crocodile clips to them. These are the ones labelled 0, 1, 2, 3V and GND (computers always start counting from zero). If you attach an edge connector board to the device it’s possible to plug in wires connected to the other (smaller) pins.
On the latest micro:bit V2 the micro:bit logo can also be used as a touch input.
In MicroPython, each pin on the BBC micro:bit is represented by an object
called pinN, where N is the number pf the pin.
For example, to use the pin labelled 0 (zero), you can use the object called
pin0 in your script. The logo pin V2 uses pin_logo.
These objects have various methods associated with them depending upon what the specific pin is capable of eg. read, write or touch.
Ticklish Python
The simplest example of input via the pins is a check to see if they are touched. So, you can tickle your micro:bit to make it laugh like this:
from microbit import *

while True:
    if pin0.is_touched():
        display.show(Image.HAPPY)
    else:
        display.show(Image.SAD)
With one hand, hold your micro:bit by the GND pin. Then, with your other hand, touch (or tickle) the 0 (zero) pin. You should see the display change from grumpy to happy!
When you use the latest micro:bit V2 you can also change the default behaviour of the pin, so that you don’t have to touch GND at all.:
from microbit import *
pin0.set_touch_mode(pin0.CAPACITIVE)
while True:
    if pin0.is_touched():
        display.show(Image.HAPPY)
    else:
        display.show(Image.SAD)
The default for the edge connector pins is resistive and the logo pin V2 is capacitive.
This is a form of very basic input measurement. However, the fun really starts when you plug in circuits and other devices via the pins.
Bleeps and Bloops
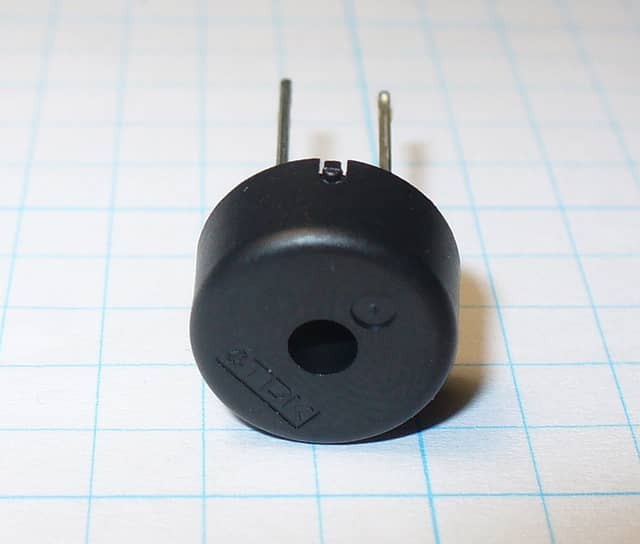
The simplest thing we can attach to the micro:bit is a Piezo buzzer. There are two types of piezo buzzers. The simplest type to use are called active buzzers. Active buzzers contain an oscillator that produces a tone at a predetermined pitch when a current is passed through them. Passive buzzers require an oscillating current to be passed through them to produce a tone at the frequency of the oscillation. In short, active buzzers are simple to use but produce only one tone, while passive buzzers are slightly more complicated to use but can produce a variety of tones.

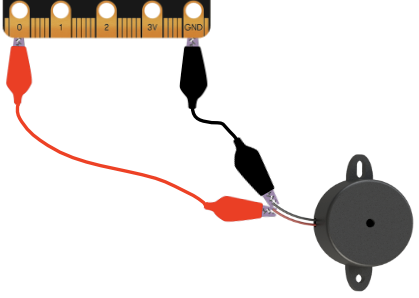
We’re going to use an active piezo buzzer for output. To attach one to your BBC micro:bit you should attach crocodile clips to pin 0 and GND (as shown below).

The wire from pin 0 should be attached to the positive connector on the buzzer and the wire from GND to the negative connector.
The following program will cause the buzzer to make a sound:
from microbit import *

pin0.write_digital(1)
This is fun for about 5 seconds and then you’ll want to make the horrible squeaking stop. Let’s improve our example and make the device bleep:
from microbit import *

while True:
    pin0.write_digital(1)
    sleep(20)
    pin0.write_digital(0)
    sleep(480)
Can you work out how this script works? Remember that 1 is “on” and 0
is “off” in the digital world.
The device is put into an infinite loop and immediately switches pin 0 on. This causes the buzzer to emit a beep. While the buzzer is beeping, the device sleeps for twenty milliseconds and then switches pin 0 off. This gives the effect of a short bleep. Finally, the device sleeps for 480 milliseconds before looping back and starting all over again. This means you’ll get two bleeps per second (one every 500 milliseconds).
We’ve made a very simple metronome!